

Django – born January 23 1910
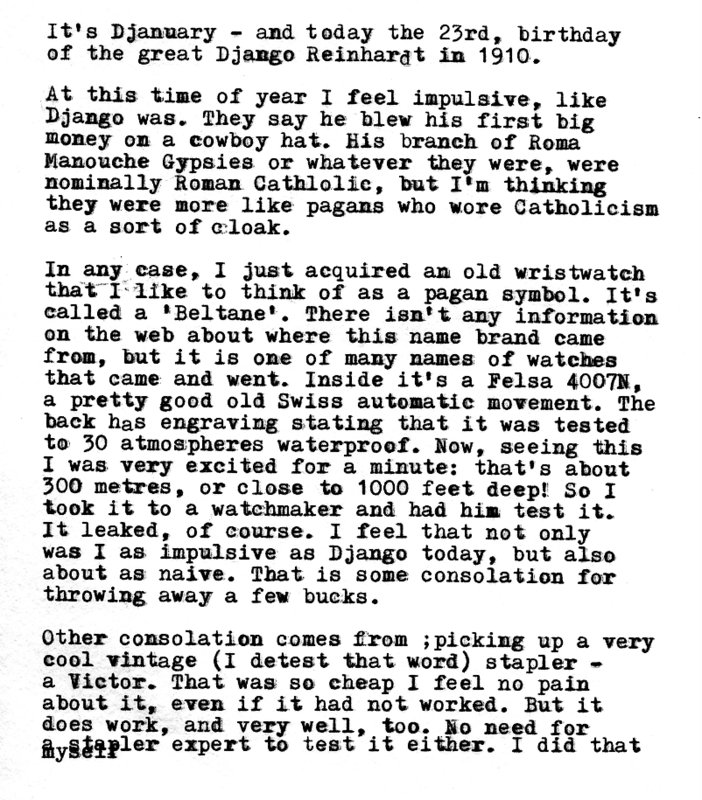

Beltane -the watch for Wiccans
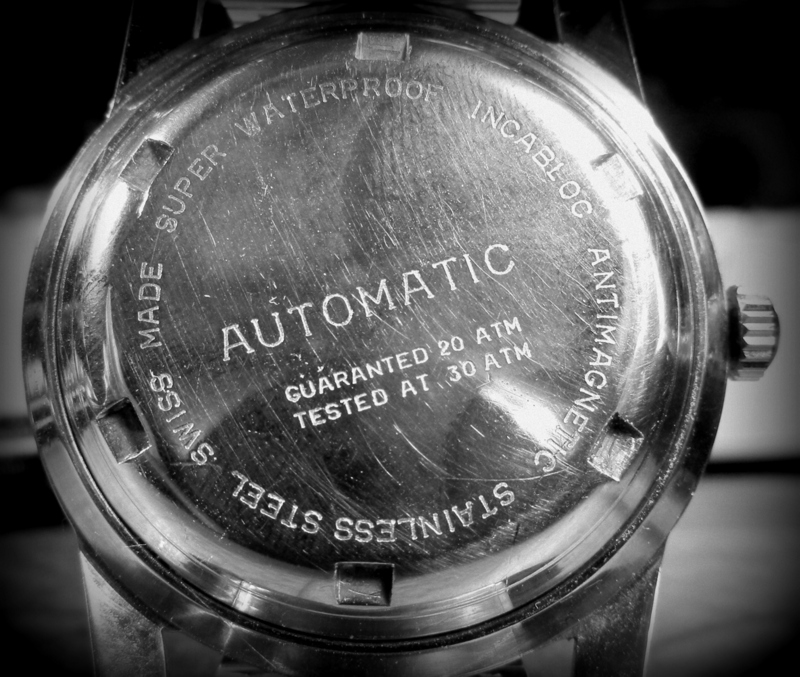
30 atm = 1000 metres! NOT


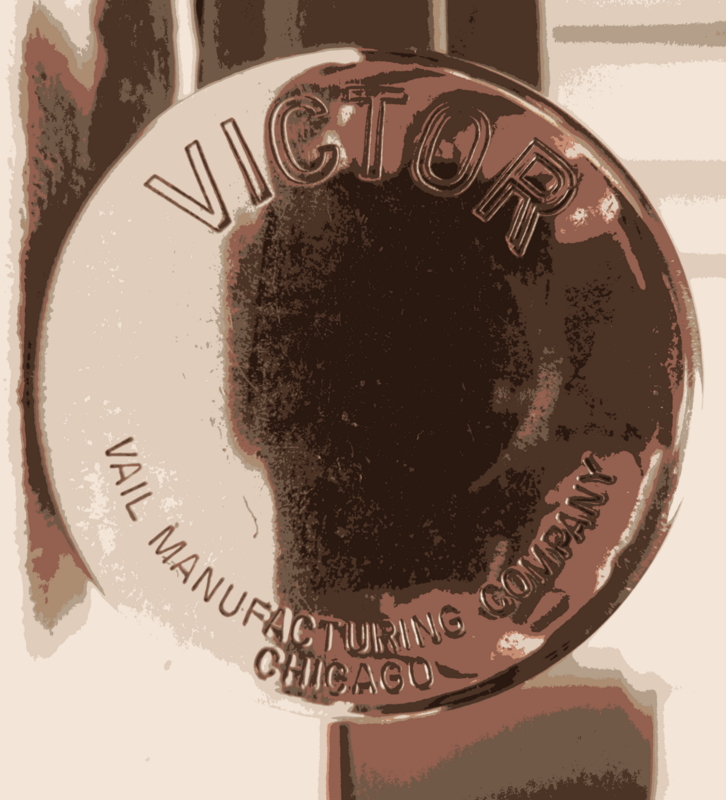
Victor – the stapler!
slam here to staple
Django – born January 23 1910
Beltane -the watch for Wiccans
30 atm = 1000 metres! NOT
Victor – the stapler!
slam here to staple
Filed under Photography, Thrift shop finds, Typewriters, Uncategorized, Watches

the next BIG THING


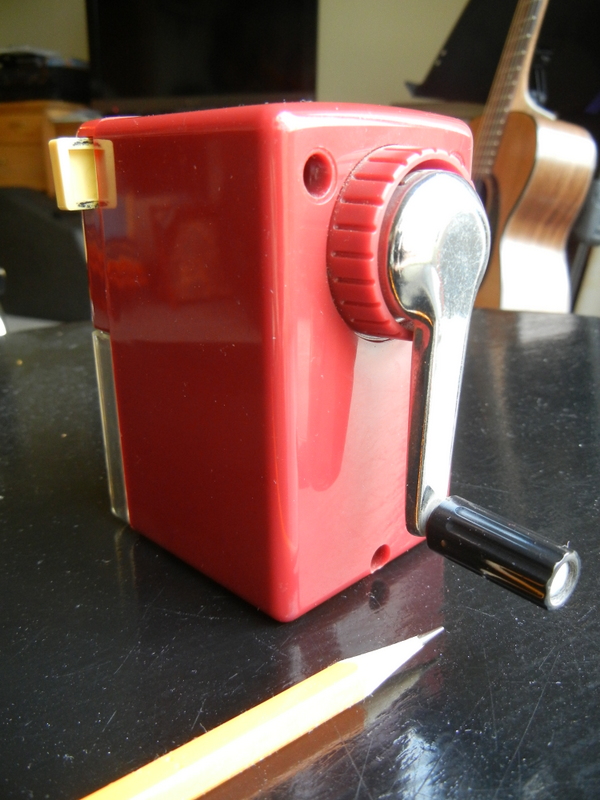
the Apsco Beaver – how Canadian eh?
rear view
Note: this thing put a very fine point on a no. 2 pencil in short order. Price: 50 cents. Original price $13.50 ( sticker on bottom).
No pencil lover should be without this essential tool.
Filed under Poetry, Thrift shop finds, Uncategorized
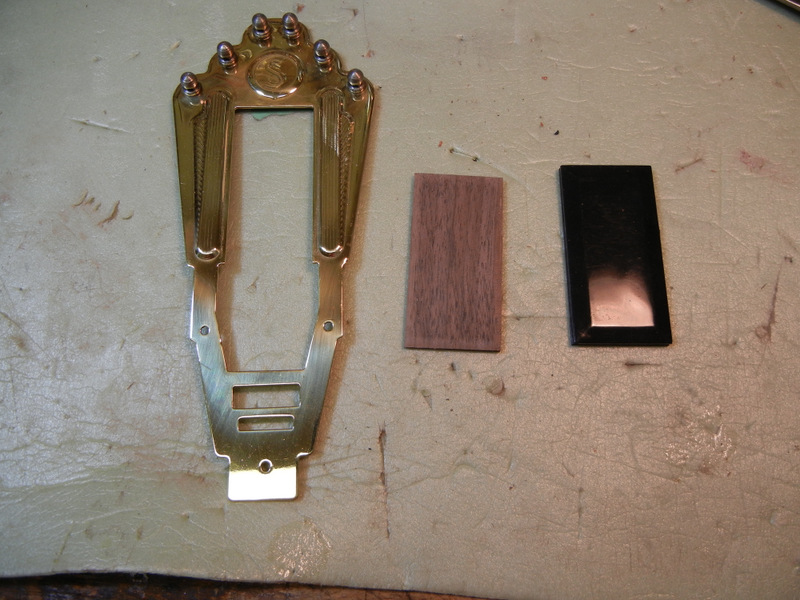
Selmer style tailpiece with replacement walnut insert & original plastic one
Time to put it all together and see what turns out. Once the neck is glued on the next major hurdle is to install strings. For this we require a bridge and a tailpiece. The tuners and nut are already done per previous posts. So I unwrapped the tailpiece, which is a copy of the original Selmer one. This design dates to the 1930’s and is a classic. It is seen on virtually every “gypsy jazz” guitar, or a facsimile thereof.
Interruption for rant here:
I don’t like the term “gypsy jazz” guitar. It connotes something false, which is that these guitars are designed for a certain musical style. They aren’t – period. They were adopted for it, hence the strong association. But they were designed to be guitars with good projection, something that could be heard above a band full of brass. They have a wonderful all round sound, and are great for all types of musical styles. The French know this, and there this style of guitar is ubiquitous and used by all genres of musicians. Here, unfortunately, the guitar playing public is sadly unaware of the amazing qualities of this guitar style.
To get on with the guitar making, I removed the cheapo plastic insert from the tailpiece so I could put in a nice matching piece of walnut. A few saw cuts around the edges and in it went. Then I spent half the day wiping on the french polish finish. About twenty coats later it began to shine. Then I put the red leather patch on. This is traditional, and protects the guitar wood from the sharp metal edges. The tailpiece comes flat too, and has to be bent. Clamp in vice and bend 90 degrees – done. To install it has to be dead centre with the neck. I checked this again with my long metal straight edge, and verified the centre line. Right at the butt seam where it was designed to be. Good work!
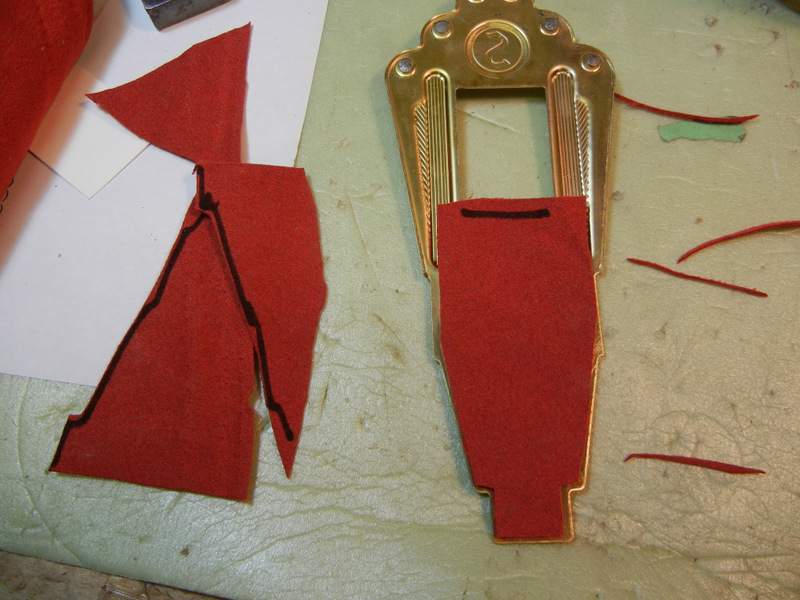
red suede leather piece glued to underside of tailpiece
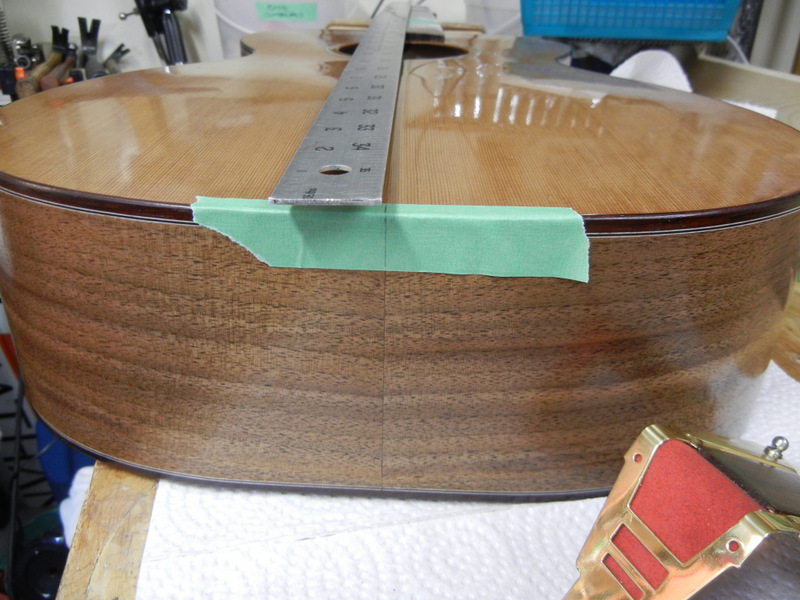
checking centre line
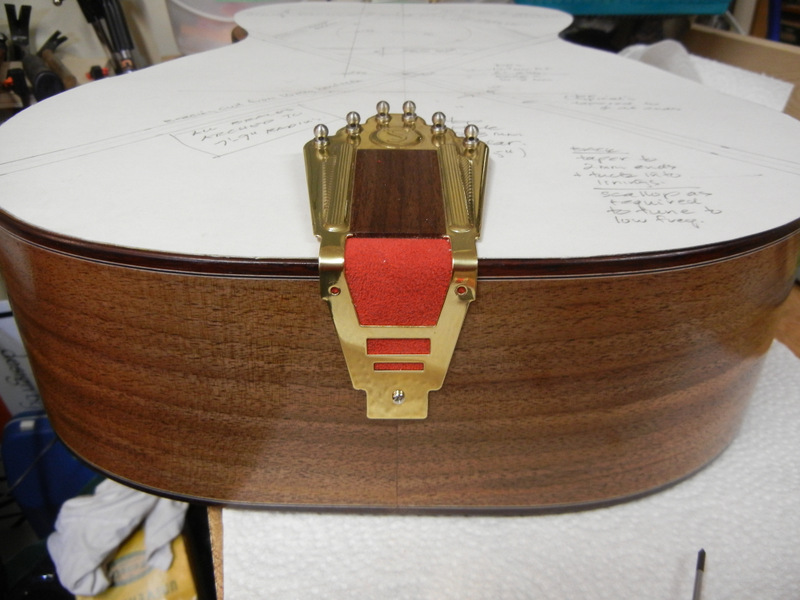
tailpiece attached with one screw for now
Now we need a bridge! I used a walnut blank which I had around. First step is to get it the right size. I sawed away the excess and sanded it on the machine. It should be 15mm wide and at least 25mm tall, 150mm long. Then we make the feet. The bridge sits on top of the X brace, one foot on each leg. The feet are 25mm long, and between them and at the ends there is a gap of about 2mm height. I make small saw cuts and file and chisel out the gaps.

making the bridge feet
Once the feet are done the bridge has to be fitted to the top. A little sanding in place does the trick, so the feet are seated correctly, and the pressure is evenly distributed. I’m protecting the top with cardboard. This finish is easily scratched, and since it is so highly polished any tiny scratch shows up glaringly.

sanding the bridge feet to match the contour of the top
Once the bridge fits the top the carving begins. I use a long stick with a half pencil on the end to mark the bridge height. I shim the 12th fret to get the required string height that I want. Then I remove the excess wood from the bridge blank.

bridge marking tool
After the bridge is the correct height the top edge has to be formed. First a line is marked on top that indicates the top edge. This is angled slightly as required for string length compensation. Then I grind away the sides using the end roller on the bench sander. I also remove the excess length from the ends and grind out a concave curve in each end.

bridge in near final shape getting checked for height
Now we can string it up and make the final adjustments. The tailpiece is on, and we have a bridge that is close to the right height, so the strings will go on now. But first I put on the outer two strings and set the string width at the bridge. This involves getting the outer strings with the right edge clearance to the fingerboard. I need at least 3mm. Once set, I mark the position of these two strings. In this case it was 56.5mm wide. Then I use a graduated string width scale and mark in the middle four strings. With files that are the widths of the strings (or close to them) I file a groove for each string to sit in. Then I final sand the bridge and give it wipe with oil. I like the look of an oil finish on the bridge, as opposed to a shiny shellac finish. Much fiddling will go on to get the string heights to the right action, but the basic setup is done.
Before I get to the end here, I had to make a pick guard. Since the guitar is very small the off the shelf pick guard was too large, so I had to modify it to fit. For this I got out the old circle cutter used for the rosette. I set the radius and taped the plastic piece to a piece of signboard plastic, then cut out the right curve to fit this sound hole.

sound hole jig used to trim pick guard
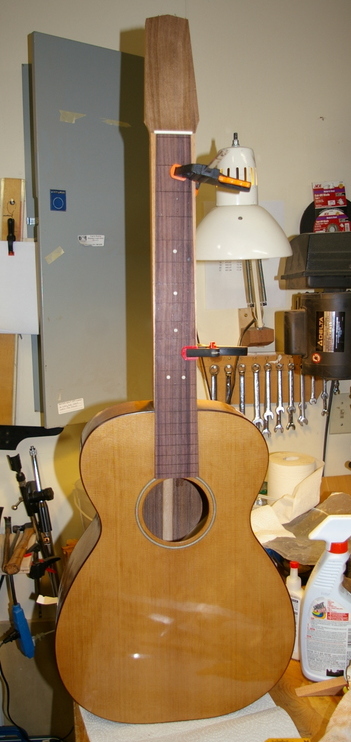
Well, that’s it. I won’t go into all the details of setting up a guitar here. It takes a while to finesse it all so it plays well; action adjustments, and minor fret work to remove high spots here and there. Also more french polishing with the pad, micro polishing with super fine paper and oil, re-polishing, etc. But we have a guitar. Here it is. I like the sound of it. For a small guitar it’s surprisingly loud, and well balanced. The high frequencies are very strong, and it really delivers in the bass as well. It’s very light, too. Weight: 1474g, or 3 lb 4 oz.
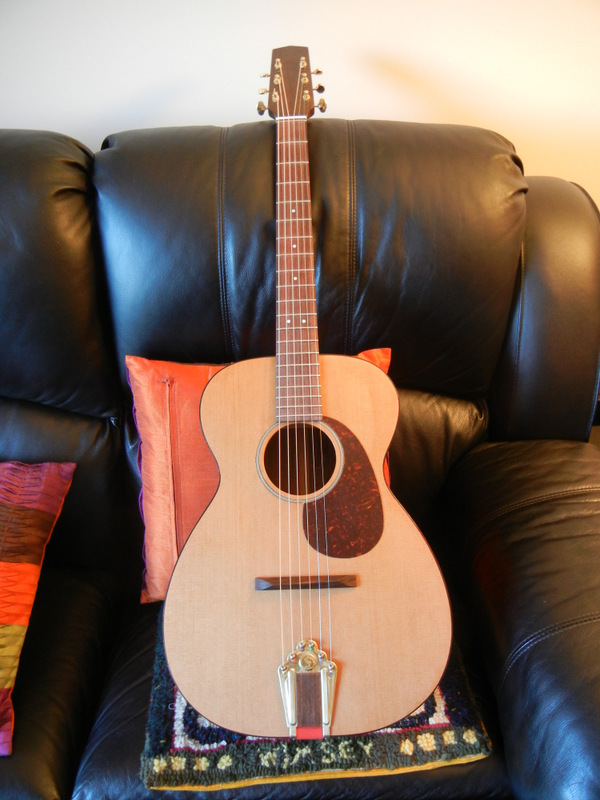
Guitar #29
Neck assembly coming up below!

easing the tuner bushing holes in the headstock
Before assembling the neck to the body I completed the installation of the tuners and made a nut. The holes in the headstock were too tight so I eased them out another 64th by hand with a drill. Then I installed the tuners. I cut the nut from a piece of bleached bone. I have a scale for this which has graduated slots on it, slots which account for the increased width of the strings as well as providing any number of spacing options. The nut slots are filed with special files, too. There is a file for each string thickness.

nut before trimming

nut after trimming
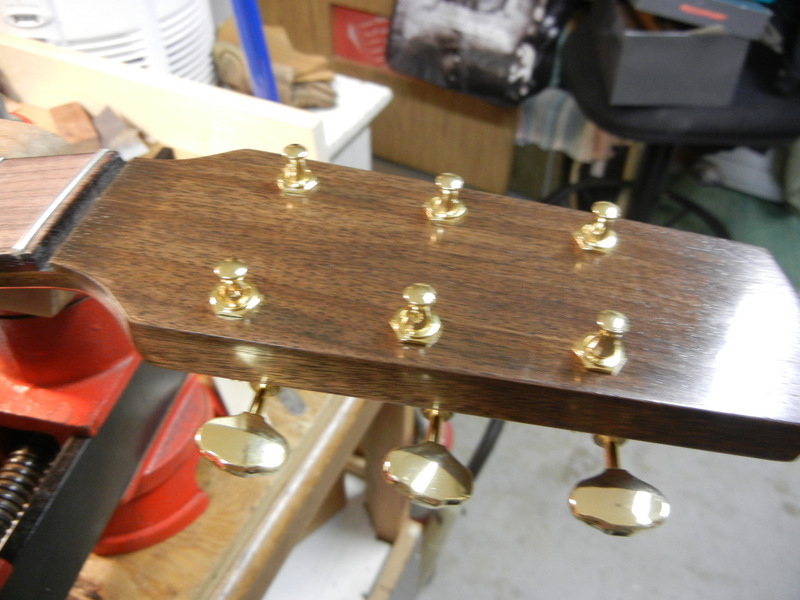
tuners installed – note press in bushings
Finally! Time to assemble. Many dry runs were done first, to ensure the fit was tight and had no slop. This took me a long time, even though the clearances are tiny they have a large effect. I adjusted my shims this way and that and finally ended up using a strip of blue shop towels soaked in glue. I needed 0.050 mm and the towels are 0.025 thick, which with both sides gives me just what I need. I tried with thin veneer but that didn’t work as well. The compressibility of the soft towel seems to be more forgiving in any case, which is why I seem to end up using this method a lot. I can testify that it works well.
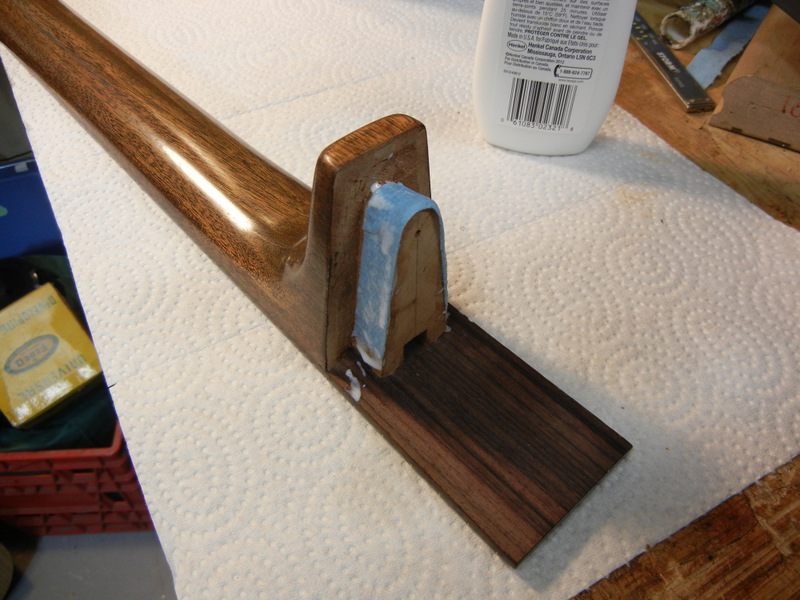
neck ready to insert, with shop towel gasket/shim
The fingerboard gets glued to the top as well, but doesn’t need much glue. That joint isn’t structural, so minimal glue is required. I sanded off the finish under the fingerboard to get good adhesion. Glue does not stick to shellac very well.

finish removed beneath fingerboard
The neck should fit into the slot almost 100% before there is resistance. Then with a little clamp pressure it seats to the bottom and is rigid. That is the theory anyways. Hence all the fiddling around with shims and gaskets. This time it fit perfectly. I clamped it to seat the dovetail and also clamped the heel down to ensure that there will be no gap at the back. For this I have a long Klempsia clamp. I have a bunch of these clamps, which slide on a rail and are made with wooden jaws and cam levers. No woodworker should be without some.
One last note for today: I almost forgot the truss rod, because it’s not glued in. But it’s in there now, loose but snug. If it ever breaks the neck can be removed and the rod replaced. It does work, I tested it.
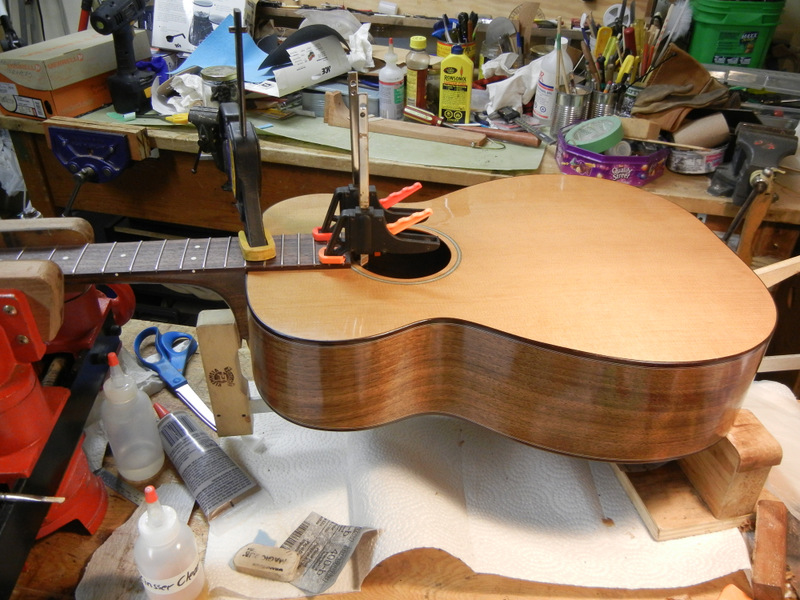
neck joined to body and clamped
Filed under Guitars
The neck is just about ready to assemble. Lots of shaping and sanding have been done, using progressively finer sandpaper until 360 grit. That is about as smooth as required for finishing. I have hit my target dimensions for depth and the two critical widths: the nut and at the body junction.

neck depth at first fret

nut width good

width at body a tiny bit wide, but OK
Once the neck was as smooth as I could get it I drilled the holes in the headstock for the tuners. These require drilling first a 1/4″ hole for the shaft, then a larger one on the face for the press fit ferrule ring.

drilling tuner holes
I use tape to stop the wood from splintering when being drilled. Then I moved to the fret installation. The fingerboard was sanded once again and checked for flatness.

final sanding of fingerboard before frets
I clamp the neck in the vice and cut the frets as I go. They have to be curved beforehand, a task that I do by hand, because I don’t have the proper tool to bend the long fret pieces. I just grab the fret tang with a small set of nippers and gently bend the wire. I use a medium wide fret, mostly because the tang is a good depth, and it bites into the fret slot well. Some fret wire comes with short tangs, but these don’t sit as tightly. Even so, I often have to clamp a few loose fret ends after they are installed and glue them down with super glue.

fretting kit

neck clamped in vice and working frets sit on a neck support block
Hammering in frets has to be done carefully. You tap in one end, then the other end. Then you work both ends towards the centre, hoping that the ends don’t pop up. Sometimes they do and then you tap them down or glue them if they won’t stay seated.

bent fret ready for installation
Once all the frets are in they get trimmed with a fret nipper. Then they get filed flush, filed at an angle and also filed to remove the four sharp edges. This takes more time than installing the frets, and it is crucial to how they feel and work. They also get leveled and polished. It is a process that goes around a few times before everything looks good. When all done the frets should be level, with no sharp ends, and very shiny and smooth. The final polish is done with extra fine steel wool. This also polishes up the wood of the fingerboard nicely. It’s made of rosewood and can be very highly polished. Some builders oil the fingerboard but I generally leave them natural. In time they get dark from skin oils as they get played. I like the patina from this process.

nipping the sharp ends of the frets
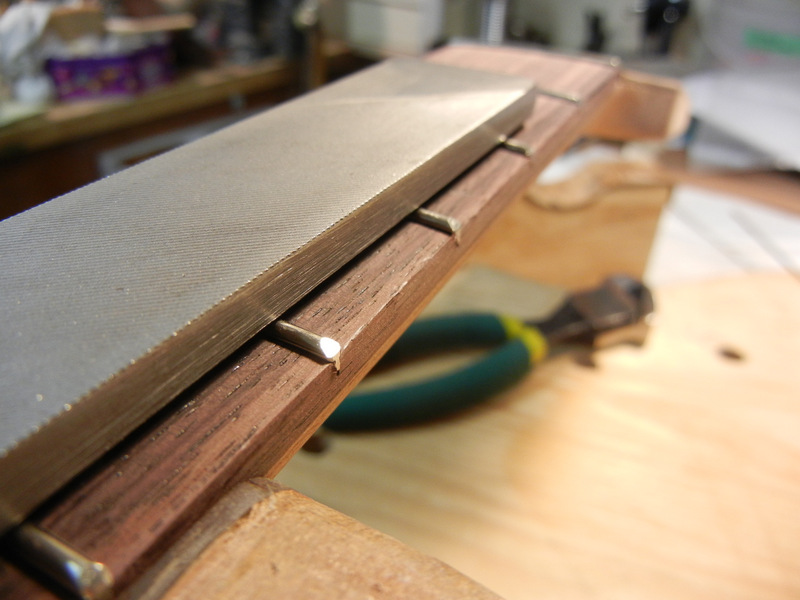
the file is used to angle the fret ends here
The file shown above is not for fret leveling, it would be too radical a cut. The first leveling is just with 360 grit sandpaper in the sanding block. That takes off any small discrepancies. At least it should if the frets have been put in right! Small variances in fret height can create annoying buzzes, and the guitar will then be back in the shop for fretwork.
After the frets were in and all the leveling and polishing was complete I put in the tiny dots on the edge of the fingerboard. I drilled the holes by hand and used superglue to glue in the thin plastic rod. This was quick and easy and I filed the excess off in a jiffy. Then I gave the neck another round of sanding before staining it dark walnut brown. For this I used a pad just like the french polishing pad. I stained the neck with a gel stain to make it dark brown. This tone goes well with the walnut body. First I masked off the edge of the fingerboard however, to avoid staining this or the plastic dots.

staining the neck with a pad and dark walnut gel stain
I gave the neck two rounds of stain, rubbing it in well and removing any wet or thick bits so it was as even as possible. This stain dries fast and I usually just go right ahead and begin the final french polish as soon as it looks good to go.
The french polish is easy on the neck, because there isn’t much area to cover. I use a small pad, and it doesn’t take much shellac to get a good build of finish.

neck with several layers of french polished shellac

What if you are Elvis?
Happy birthday to Elvis. And to me.


Filed under Photography, Poetry
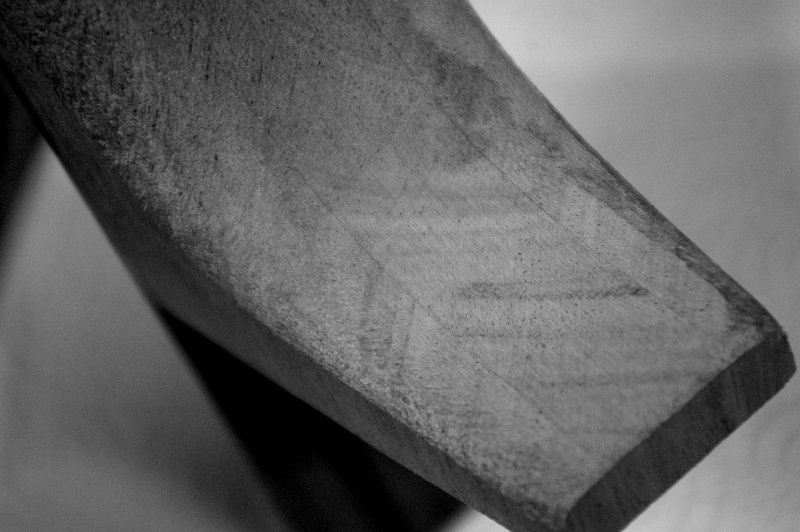
Final shaping of the neck began today. Carving a neck is like sculpting – you remove what is unnecessary to reveal what is there within. But only just so much. Plus it has to be not only pleasant to look at but comfortable to feel.

essential neck carving tools
I have a jig to hold the neck. It fits in my swivel jaw vice, which is mounted on my old workmate stand. This workmate has been in use for about 35 years or more and it is one of the must have tools for doing just about anything, never mind guitar building. The swivel jaw vice is also a must have tool for guitar makers.
neck in carving jig, in swivel vice, on workmate
The microplane flat file is an incredible thing for carving. It can hog off wood, or remove only fine shavings, depending on how you angle it, and what pressure you use. I do most of the carving with only this tool. I also use a round version of it for the curves at the heel and neck. My other tool for this is a short file, called a four in hand. It has four surfaces, two flat, two convex, and each pair comes in rough and smooth cut. This file is about the only other essential cutting tool for neck carving. Sandpaper can do the rest if necessary, but I have some round files that are very handy as well.

looking down the neck for shape
I use the calipers to keep checking the neck depth. I set them a bit too large and when I hit the mark I switch to very fine filing and sanding so as not to overshoot. You can’t add more wood after it’s been removed.

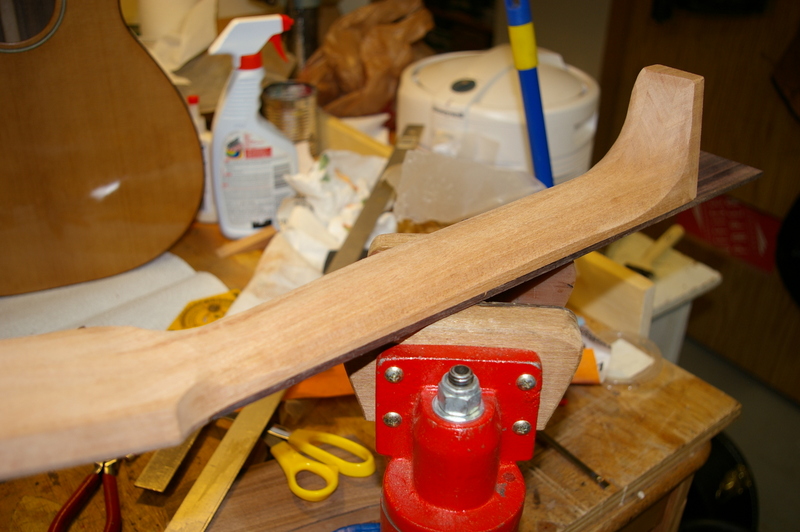
neck to head detail
The straight section is not too difficult, but the neck and heel transitions are very tricky. They take most of the work. I use the pin comparator to check my cross sectional shape for symmetry as I go along.
heel detail
The neck is almost ready for final carving. I have repeated all steps prior to busting the truss rod. That includes gluing on the head plate and fiddling with the dovetail joint. I previously thought it was correct but further inspection revealed that it needed more work. It was as if the whole thing changed while it was sitting in the shop. This is why we check not twice, but three or four times before assembling anything! As it stands I am ready to say that this time it is good to go. I hope these are not going to be famous last words.
dry fitting neck to body
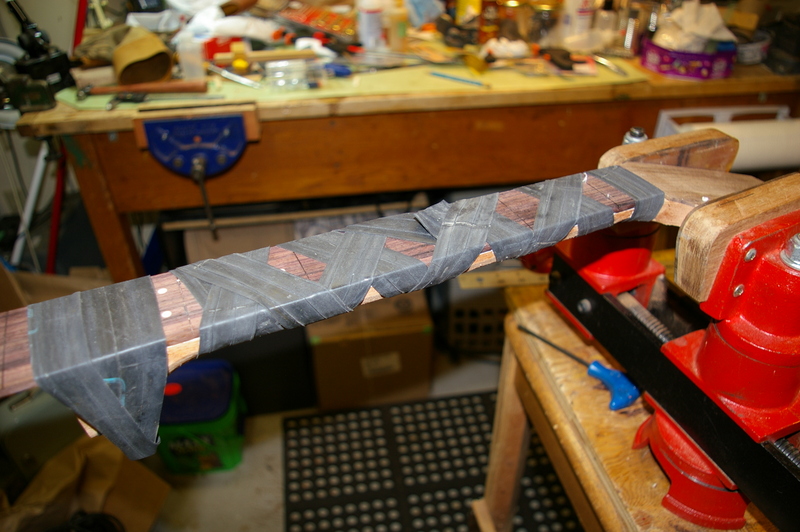
Once I had the neck joint down I lined up the fingerboard and clamped it to the neck. Then I nailed it in place with small brads, and cut the heads off. Next step was to do a lot of heavy grinding on the belt sander. I sanded the headstock down close to final thickness, as well as tapering the neck and removing a lot of wood to form the rough shape. After this I will carve by hand from here on in.
Once I was certain that everything was finally aligned I prepared to glue the fingerboard. The objective was to make sure I could slide the truss rod assembly into the slot afterwards.
rough carved neck
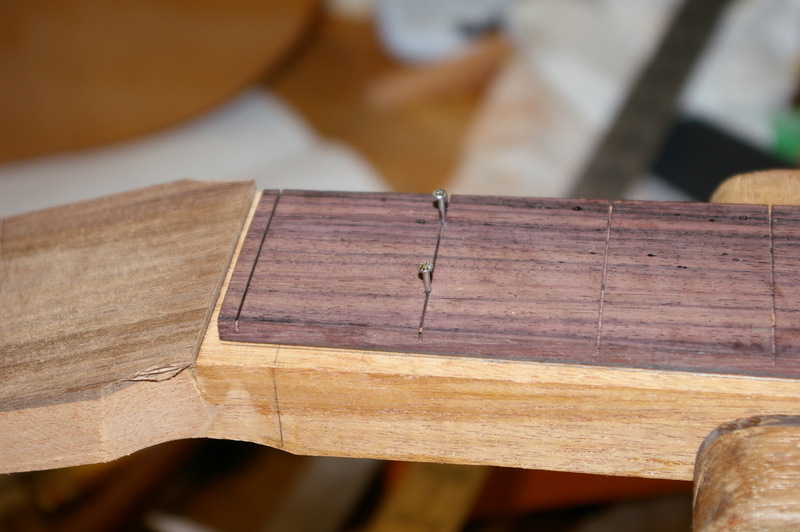
fingerboard tacked to neck prior to gluing
testing placement of truss rod prior to gluing
The truss rod slid in and out perfectly, with no slop or extra play in the slot. Time to glue the fingerboard.
here we go again
A few hours later I removed the rubber band and slid the truss rod into the slot. It went in and came out without any problem. No testing to see if it bends yet, I’m going to let the glue dry for 24 hours at least before putting any stress on it. Carving is next.
Filed under Guitars
After the truss rod mishap I ordered two more rods, which arrived yesterday. More about this later. Previously I scraped and filed down the bindings, using a spokeshave and a file. After that I began sanding. It is darn near impossible to ever get out every last tiny scratch on a guitar, simply because no matter how much you inspect it, inevitably you will miss something. That is why I take the guitar outside to examine it. But even so, I’m sure I missed something.
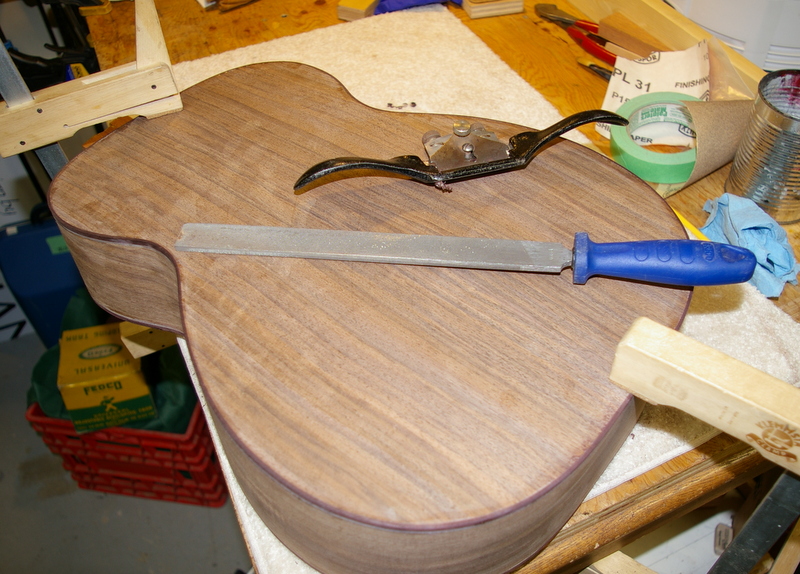
scraping the bindings
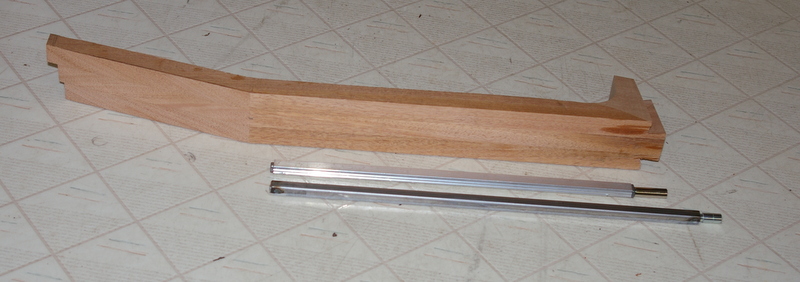
I also made a new neck blank and routed the dovetail, then fitted it. The fitting went well, since I knew the precise angle to cut, and had a good idea of how much filing would be required to straighten it up afterwards. They always need fine tuning.

new neck blank cut and fit to body
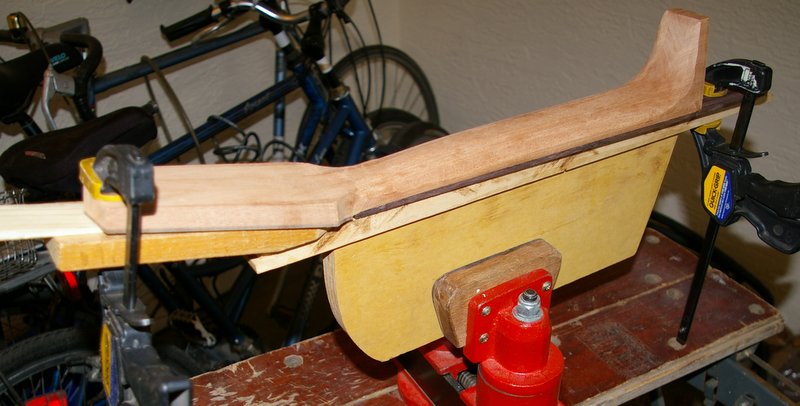
However, sooner or later the moment arrives when you have to begin applying the finish. My preferred finish is shellac. Old school, plain shellac is naturally derived, non toxic, easy to remove or add to, and gives good protection to wood on an instrument. Most other coatings are toxic, smelly, and not as beautiful in colour as shellac. You can also spray shellac now, which I have done with good results. This time I’m rubbing it on though, the old way with a little bag (called a mouse) made of cotton batting wrapped in cotton cloth. It’s an old technique but it works well once you get the hang of it. If you goof it up you can always wet sand it with super fine emery paper and oil. I often do that between sessions to level the finish and remove various swirls and fingerprints. Shellac is very soft at first but hardens up eventually. Patience is required. I try to remember this each time I begin french polishing.

Guitar body after one french polishing session – guitar is held in vise with the old neck re purposed as a handle for finishing. There is a screw on the heel locking it together.

french polish materials: alcohol, clear unwaxed shellac from a can, light furniture oil, the rubbing “mouse”, pounce bag full of fine pumice
There are now many videos on YouTube about french polishing. Some are useful, some are horrible. Basically there are no short cuts to a good job. Never try to apply shellac to a guitar or fine furniture with a brush! Practice on a piece of scrap wood first is the best advice.
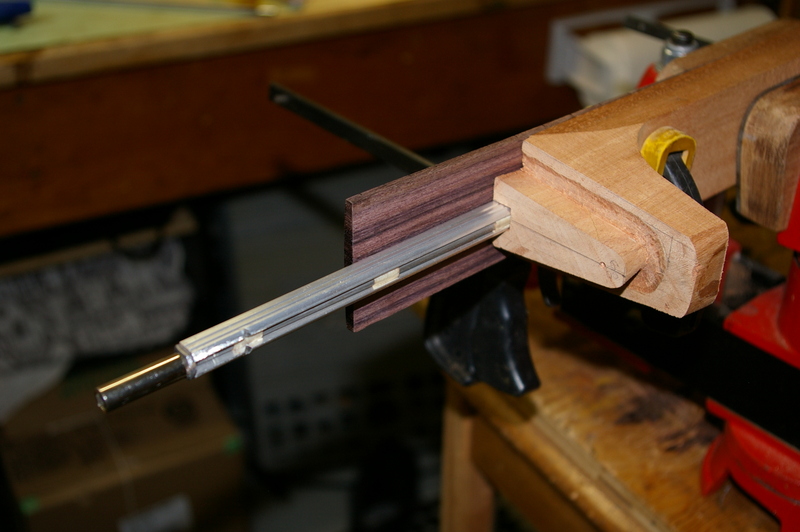
Back to the truss rods. The replacement rod and another similar one arrived together by courier. The new type rod has a steel casing, as opposed to the aluminum case of the first one. It feels much heavy as a consequence. But it it also one inch longer. Which means it will not fit, after all. This guitar has a 25″ scale, which is not that unusual, so I have no idea why the manufacturer of this long rod made it so long. I will thus once again go ahead with the original type rod, but there is no way that I will be gluing it into the neck this time.
neck blank with 2 types of truss rods
Filed under Guitars