
The neck is just about ready to assemble. Lots of shaping and sanding have been done, using progressively finer sandpaper until 360 grit. That is about as smooth as required for finishing. I have hit my target dimensions for depth and the two critical widths: the nut and at the body junction.

neck depth at first fret

nut width good

width at body a tiny bit wide, but OK
Once the neck was as smooth as I could get it I drilled the holes in the headstock for the tuners. These require drilling first a 1/4″ hole for the shaft, then a larger one on the face for the press fit ferrule ring.

drilling tuner holes
I use tape to stop the wood from splintering when being drilled. Then I moved to the fret installation. The fingerboard was sanded once again and checked for flatness.

final sanding of fingerboard before frets
I clamp the neck in the vice and cut the frets as I go. They have to be curved beforehand, a task that I do by hand, because I don’t have the proper tool to bend the long fret pieces. I just grab the fret tang with a small set of nippers and gently bend the wire. I use a medium wide fret, mostly because the tang is a good depth, and it bites into the fret slot well. Some fret wire comes with short tangs, but these don’t sit as tightly. Even so, I often have to clamp a few loose fret ends after they are installed and glue them down with super glue.

fretting kit

neck clamped in vice and working frets sit on a neck support block
Hammering in frets has to be done carefully. You tap in one end, then the other end. Then you work both ends towards the centre, hoping that the ends don’t pop up. Sometimes they do and then you tap them down or glue them if they won’t stay seated.

bent fret ready for installation
Once all the frets are in they get trimmed with a fret nipper. Then they get filed flush, filed at an angle and also filed to remove the four sharp edges. This takes more time than installing the frets, and it is crucial to how they feel and work. They also get leveled and polished. It is a process that goes around a few times before everything looks good. When all done the frets should be level, with no sharp ends, and very shiny and smooth. The final polish is done with extra fine steel wool. This also polishes up the wood of the fingerboard nicely. It’s made of rosewood and can be very highly polished. Some builders oil the fingerboard but I generally leave them natural. In time they get dark from skin oils as they get played. I like the patina from this process.

nipping the sharp ends of the frets
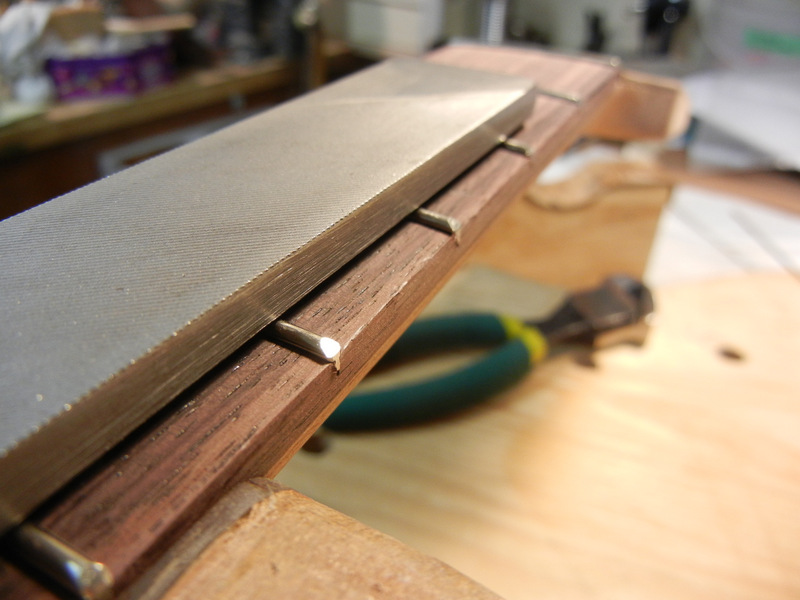
the file is used to angle the fret ends here
The file shown above is not for fret leveling, it would be too radical a cut. The first leveling is just with 360 grit sandpaper in the sanding block. That takes off any small discrepancies. At least it should if the frets have been put in right! Small variances in fret height can create annoying buzzes, and the guitar will then be back in the shop for fretwork.
After the frets were in and all the leveling and polishing was complete I put in the tiny dots on the edge of the fingerboard. I drilled the holes by hand and used superglue to glue in the thin plastic rod. This was quick and easy and I filed the excess off in a jiffy. Then I gave the neck another round of sanding before staining it dark walnut brown. For this I used a pad just like the french polishing pad. I stained the neck with a gel stain to make it dark brown. This tone goes well with the walnut body. First I masked off the edge of the fingerboard however, to avoid staining this or the plastic dots.

staining the neck with a pad and dark walnut gel stain
I gave the neck two rounds of stain, rubbing it in well and removing any wet or thick bits so it was as even as possible. This stain dries fast and I usually just go right ahead and begin the final french polish as soon as it looks good to go.
The french polish is easy on the neck, because there isn’t much area to cover. I use a small pad, and it doesn’t take much shellac to get a good build of finish.

neck with several layers of french polished shellac


great post…any day soon it will speak….