Category Archives: Repairs

Lure of the Royal 10

1921 Royal 10
white keys
Rebuilt sticker on back: Like-Nu
love those decals
standard spool with wire to engage the gear wheel below
the correct Royal spool with tangs and the reversing tab

I replaced the old worn down hardened rubber feet with new soft rubber wine carboy bungs. I sawed them to the right depth and drilled out the centre holes to enlarge them for the holding screws. The bungs were the perfect diameter and the feet work very well now. All old typewriters should be so easy to fix this way!

worn down hardened rubber feet
cutting a rubber bung to size
drilling out the centre – held in a vacuum brush
new rubber foot
feet on, ready to type

1 Comment

Filed under History, Repairs, Typewriters, Uncategorized

Clipper Makeover

repainted Smith Corona Clipper

Boeing 314 “Clipper”, named after a typewriter!

It’s been years since I repainted a typewriter. I recently sold the last one I repainted, so when I picked up a drab Smith Corona Clipper I decided to have another go at repainting. I had forgotten just how much work it is, and how fussy. I removed all the panels, sanded out the chips and scratches, then filled in the holes with quick body filler, sanded again, then primed and then got down to spraying. Of course I screwed it up right away by missing spots and then adding too much paint to others. You can’t respray this paint unless you wait 24 hours, another mistake I learned about the hard way when the old paint wrinkled. This machine has CLIPPER printed on the back of the paper feed, but the serial number and features are those of a Sterling, series 5A, not 5C. So it’s a Sterling with a Clipper label. I decided to recreate the Clipper logo with the Boeing Clipper, and print my own water slide decals for that and the Smith Corona name. I copied the clipper logo from a photo I found on line and worked up a reasonable facsimile by hand drawing the plane and importing that into MS Publisher. Combined with text and another imported file of a blue line I drew for the waves, I designed my own Clipper logo, which I then printed on clear water slide decal paper.


Same thing for the Smith-Corona logo.

I clear coated the lid to protect the decals and reassembled the bodywork. It’s a lovely typewriter, but I’m going to sell it because I have several of these already, and don’t need more of the same. I hope someone will enjoy this little gem. I won’t get enough money for it to justify all the work involved, but it was fun all the same. Also, I learned how to make water slide decals, and made some labels for my guitars.

During the process of hunting down the logo for the Smith Corona Clipper, I learned a lot about the Boeing 314 “Clipper”. Air travel should be like this! Beds and staterooms, dining rooms, lounges, and separate bathrooms for men and women. Air travel has really improved since those days, because now we have gender neutral toilets. Plus we have 50 channels of programs. Back then they had to get up to go eat. Now they bring you the “food”, and it is so delicious.

Boeing only ever made 12 of them, all for Pan Am Airways, but the plane is much larger in legend. Every plane was called a Such and Such Clipper. There are none left. Only typewriters remain…and of course our own Victoria to Seattle Clipper – a fast catamaran that goes from here to Seattle daily. Maybe they will buy this typewriter for the passengers to use!

The Victoria Clipper

sheet of decals

my version of the Clipper logo

my Smith Corona decal

Guitar logos:


4 Comments

Filed under Guitars, Repairs, Typewriters, Uncategorized

Super-Duper

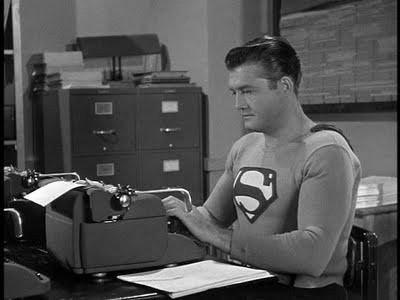
fake Superman, with genuine Super-Riter

You may have seen this before – but if not, it’s “Superman” (the fictional one, not the real one), typing on his typewriter – A Remington SUPER-RITER. I bet he had a sore back, because of his arm position. He should have had one of my typewriter shelves, but alas they weren’t around in his time. Here is my Super-Riter:

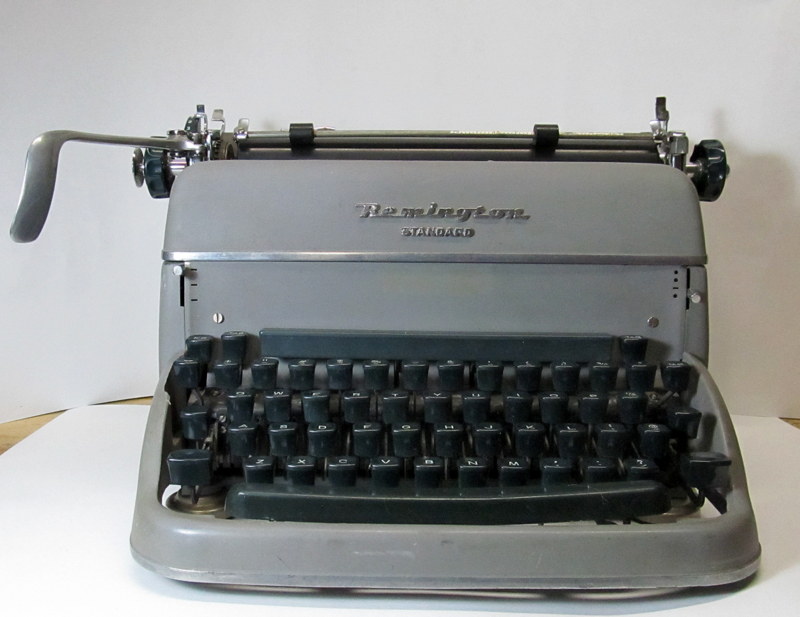
genuine 1961 Remington Super-Riter

side view, viewers left/stage right

After using this new acquisition, I have to agree that it is SUPER! I’m not keen on big heavy desk models, since they are a pain to move around, and I have nowhere to permanently place one. But I grabbed this big boy from a thrift shop last week, because it called to me. I bent down and typed a few letters on it in the store, and the smooth action was remarkable. I had previously seen one at a church bazaar, and recalled that it was very quiet, smooth and precise. So this time I jumped in and brought it home. It needed a minimal amount of cleaning, but was otherwise in fine shape. There was one niggling problem however: the ribbon selector was erratic. After several sessions on the net, I discovered a very interesting feature of this machine – it folds open! Yes, they called this “fold-a-matic”. Munk, praise be to him, had the instructions for opening the back of the machine up. Polt, too, ever helpful in time of need, provided the service manual. With this combination of precise instructions I  proceeded to open the machine. This is analogous to open heart surgery for typewriters, but typewriters feel no pain and cannot be killed, as far as we know, except by Superman.
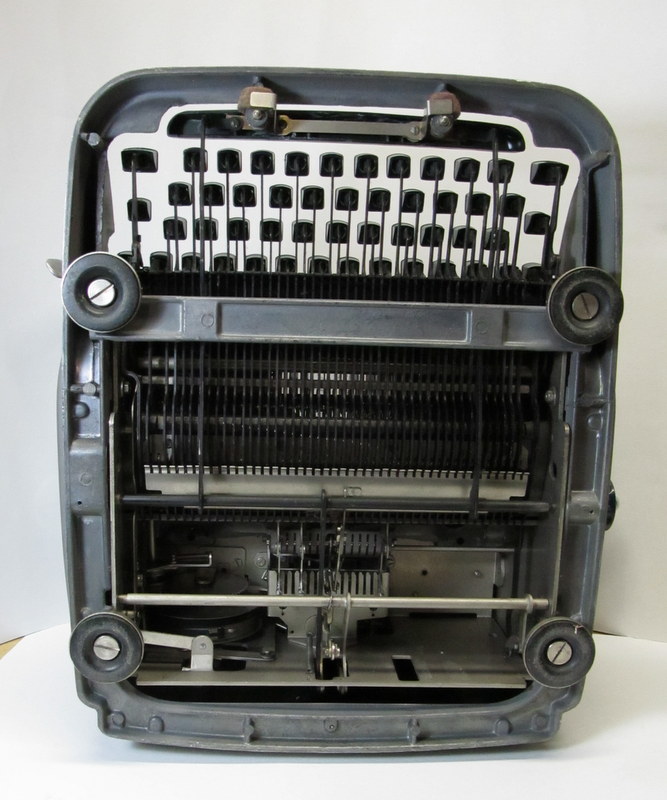
open Super-Riter

There are numerous blogs with information on the Super-Riter, but this is the first one to feature an actual open heart operation. Be sure you’re seated and have someone with first aid experience nearby while watching this, unless you’re a doctor. It is shocking! The back opens up with the removal of a few screws. First one removes the platen, however, achieved by flipping two levers and lifting it off. Dead simple. Oops, I didn’t mean to say dead, excuse me.

flip the L shaped lever and lift out the platen (2 of)

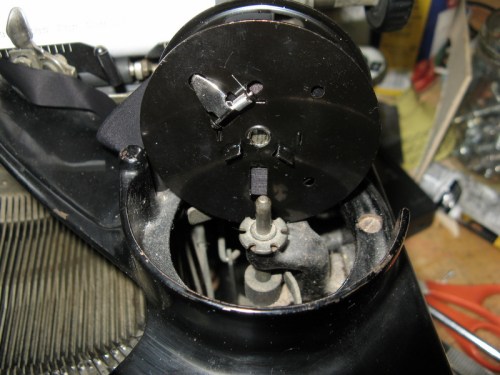
Once you remove the screws, the back almost opens by itself. I tilted the back open, exposing the ribbon selector-vibrator parts and performed a minimally invasive procedure known as a selector-ectomy, involving a small screwdriver and some simple but precise adjustments. Then it was time to close, which was as simple as opening, except in reverse order. The biggest risk is losing a screw, which I often do, but this time I got lucky and there were no missing or leftover pieces after reassembly was complete.

hole for screw (centre) to remove for opening. Note the solid steel rails!

view of the main spring and tab mechanism (to the right of the motor)

ribbon selector-vibrator linkage

Super-Riter is back in one piece now and recovering well. It’s a marvelous bit of engineering, and it types with near perfection. The sole downside is the weight, 32 lbs. It’s so heavy that when you get typing, the machine will begin to sway even a solid table due to resonance and its mass. Placed on a heavy table, I imagine it would be heavenly. On a TV tray, extremely risky! Not for card tables this sucker.

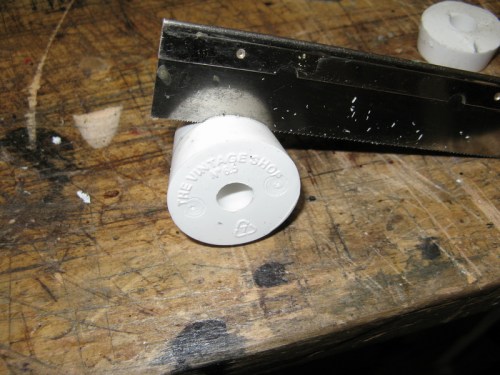
with platen out, it’s simple to remove all the rollers too.


last but very important – the bottom

Indeed, what more could you want?

in case you need help to change the ribbon – there are still typewriter repairmen – in Montreal!

one last look

In summary – the Remington Super-Riter can best be described as a luxury typewriter, engineered and built to the very best standards, during the glory years of Western Civilization, c. 80-30 BC (Before China). During the early years of that era, men dictated and women typed on these things, that is until Superman came along and lead the way for men to use them without embarrassment. Now, men all over the world covet them and wouldn’t dream of allowing women near their precious machines. Women have moved on, however, so the joke is on men!

P.S.  to find plans for my typewriter shelf click this link:

https://nathanguitars.com/2016/02/26/the-oliver-courier/

2 Comments

Filed under History, Repairs, Technology, Thrift shop finds, Typewriter accessories, Typewriters, Uncategorized

Remington Repair for Dunces* tm reg’d!

1929 Remington Portable #3

platen advance lever

missing stud replaced with a nail

I recently acquired a 1929 Remington portable 3. I now have a 1, 2  & 3 of these, and it’s interesting to see the slight differences as the design was changed. The model 3 I found was missing a small stud from the carriage advance lever. I knocked out the embedded bit and hammered in a small nail in its place. That fixed the problem, and the typewriter is now working well – amazing for a 90 year old machine! The model 3 has a slightly wider platen than the #2, which was slightly wider than #1. The #1 had a simple advance mechanism that was much improved with the addition of the lever on model 2, which carried over to model 3. Model 2 had the original lifting typebars, which are gone in model 3, in favour of a low panel on the top front that conceal the slightly raised typebars. I assume this saved money in manufacturing, by eliminating the lifting mechanism. Something was lost however, in the way of a very interesting and unique feature. Model 3 also introduced a margin release key and fixed tabs, marked with a red keytop, as Olivetti became well known for later on with the Lettera 22. But Remington was first!

1922 Remington Portable #1

1926 Remington Portable #2 (note German keyboard)

model 1 side view with lifting typebars

7 Comments

Filed under History, Repairs, Technology, Thrift shop finds, Typecasting, Typewriters

Recycled, Reused, Repurposed

TIME FOR ANOTHER QUIZ!

What do these have in common?

space for guessing here before I give the answer.

zzzz

zzzzz

zzzzz

zzzzzz


ANSWER:


grommets – 4 each, to be exact!


grommet from Nintendo cube CD player

This is where they go after you have removed them from the Nintendo Cube:

This fortuitous discovery came in handy  with one of my Italian made L22’s that had lost its grommets due to disintegration. I had these 4 nice soft rubber grommets left over from a project I was doing with my son – combining a Nintendo Cube with a modern Nintendo. I save things like this whenever I find them, because sooner or later they tend to come in handy. I thus saved these 4 dumbbell shaped hollow rubber grommets from the CD player suspension of the Nintendo. By squeezing, I was easily able to shove them into the 4 empty holes in the metal case of the L22, where they seated perfectly. They were made for the job, for all intents and purposes!

2 Comments

Filed under Repairs, Technology