
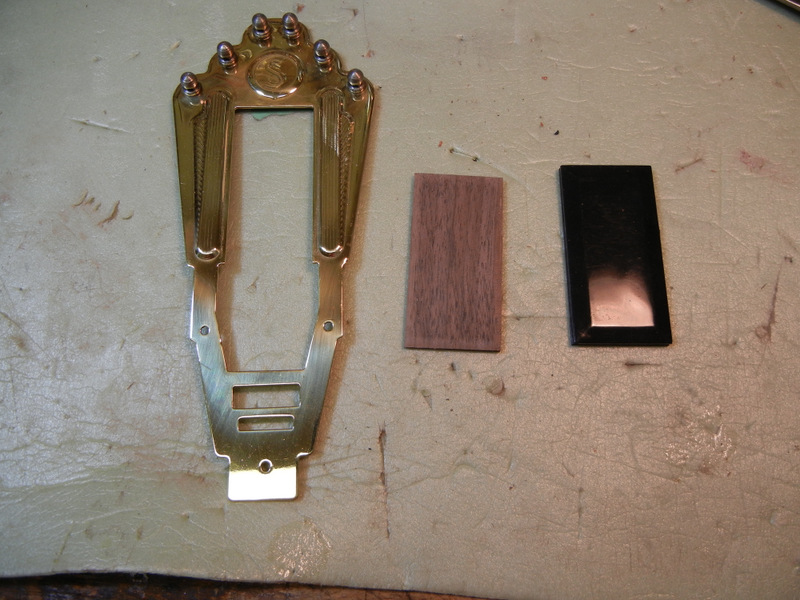
Selmer style tailpiece with replacement walnut insert & original plastic one
Time to put it all together and see what turns out. Once the neck is glued on the next major hurdle is to install strings. For this we require a bridge and a tailpiece. The tuners and nut are already done per previous posts. So I unwrapped the tailpiece, which is a copy of the original Selmer one. This design dates to the 1930’s and is a classic. It is seen on virtually every “gypsy jazz” guitar, or a facsimile thereof.
Interruption for rant here:
I don’t like the term “gypsy jazz” guitar. It connotes something false, which is that these guitars are designed for a certain musical style. They aren’t – period. They were adopted for it, hence the strong association. But they were designed to be guitars with good projection, something that could be heard above a band full of brass. They have a wonderful all round sound, and are great for all types of musical styles. The French know this, and there this style of guitar is ubiquitous and used by all genres of musicians. Here, unfortunately, the guitar playing public is sadly unaware of the amazing qualities of this guitar style.
To get on with the guitar making, I removed the cheapo plastic insert from the tailpiece so I could put in a nice matching piece of walnut. A few saw cuts around the edges and in it went. Then I spent half the day wiping on the french polish finish. About twenty coats later it began to shine. Then I put the red leather patch on. This is traditional, and protects the guitar wood from the sharp metal edges. The tailpiece comes flat too, and has to be bent. Clamp in vice and bend 90 degrees – done. To install it has to be dead centre with the neck. I checked this again with my long metal straight edge, and verified the centre line. Right at the butt seam where it was designed to be. Good work!
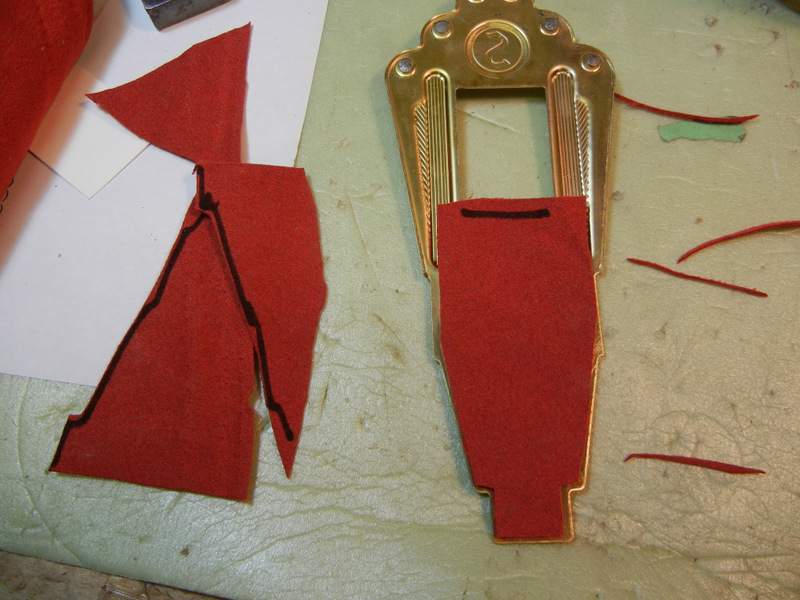
red suede leather piece glued to underside of tailpiece
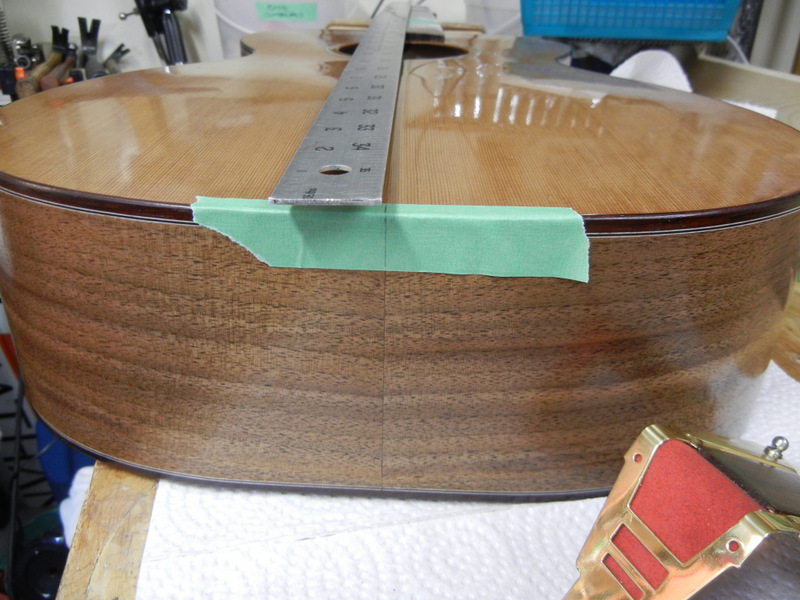
checking centre line
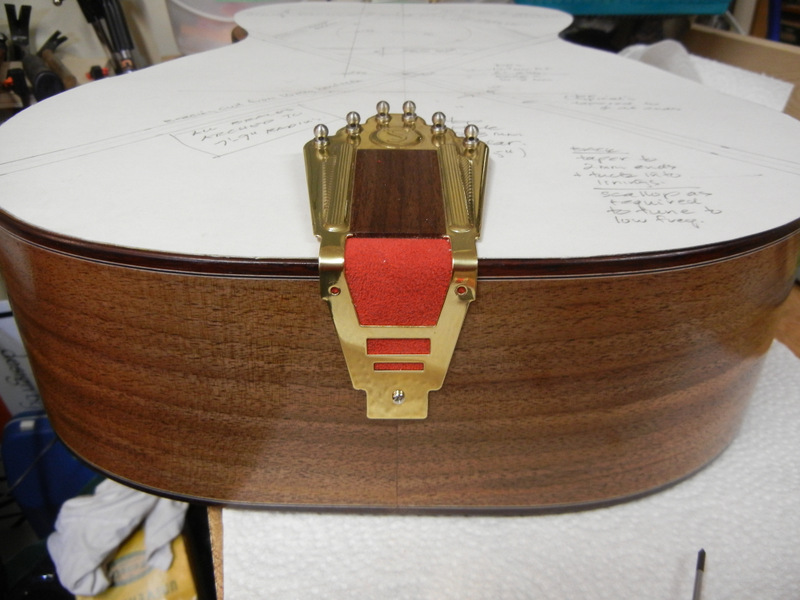
tailpiece attached with one screw for now
Now we need a bridge! I used a walnut blank which I had around. First step is to get it the right size. I sawed away the excess and sanded it on the machine. It should be 15mm wide and at least 25mm tall, 150mm long. Then we make the feet. The bridge sits on top of the X brace, one foot on each leg. The feet are 25mm long, and between them and at the ends there is a gap of about 2mm height. I make small saw cuts and file and chisel out the gaps.

making the bridge feet
Once the feet are done the bridge has to be fitted to the top. A little sanding in place does the trick, so the feet are seated correctly, and the pressure is evenly distributed. I’m protecting the top with cardboard. This finish is easily scratched, and since it is so highly polished any tiny scratch shows up glaringly.

sanding the bridge feet to match the contour of the top
Once the bridge fits the top the carving begins. I use a long stick with a half pencil on the end to mark the bridge height. I shim the 12th fret to get the required string height that I want. Then I remove the excess wood from the bridge blank.

bridge marking tool
After the bridge is the correct height the top edge has to be formed. First a line is marked on top that indicates the top edge. This is angled slightly as required for string length compensation. Then I grind away the sides using the end roller on the bench sander. I also remove the excess length from the ends and grind out a concave curve in each end.

bridge in near final shape getting checked for height
Now we can string it up and make the final adjustments. The tailpiece is on, and we have a bridge that is close to the right height, so the strings will go on now. But first I put on the outer two strings and set the string width at the bridge. This involves getting the outer strings with the right edge clearance to the fingerboard. I need at least 3mm. Once set, I mark the position of these two strings. In this case it was 56.5mm wide. Then I use a graduated string width scale and mark in the middle four strings. With files that are the widths of the strings (or close to them) I file a groove for each string to sit in. Then I final sand the bridge and give it wipe with oil. I like the look of an oil finish on the bridge, as opposed to a shiny shellac finish. Much fiddling will go on to get the string heights to the right action, but the basic setup is done.
Before I get to the end here, I had to make a pick guard. Since the guitar is very small the off the shelf pick guard was too large, so I had to modify it to fit. For this I got out the old circle cutter used for the rosette. I set the radius and taped the plastic piece to a piece of signboard plastic, then cut out the right curve to fit this sound hole.

sound hole jig used to trim pick guard
Well, that’s it. I won’t go into all the details of setting up a guitar here. It takes a while to finesse it all so it plays well; action adjustments, and minor fret work to remove high spots here and there. Also more french polishing with the pad, micro polishing with super fine paper and oil, re-polishing, etc. But we have a guitar. Here it is. I like the sound of it. For a small guitar it’s surprisingly loud, and well balanced. The high frequencies are very strong, and it really delivers in the bass as well. It’s very light, too. Weight: 1474g, or 3 lb 4 oz.
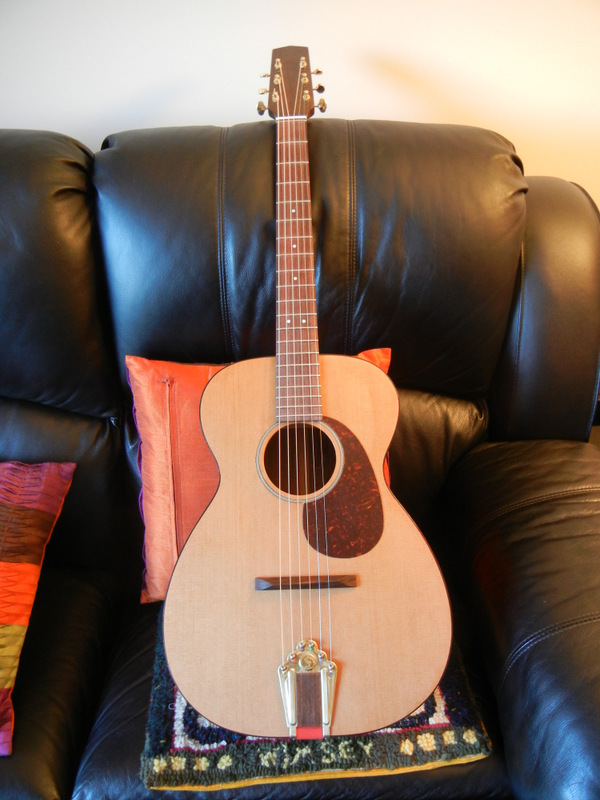
Guitar #29