
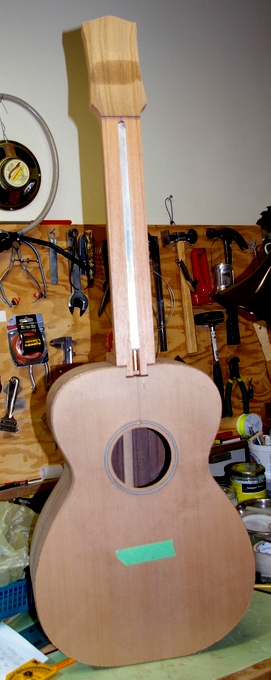
neck dry fit to body
Since last time a lot of work has been done. First thing was I dimensioned the neck. Most of this was done on the belt sander. With a heavy grit belt I let the machine grind away a lot of excess wood. Slowly but surely I got close to the final thickness of the neck and the headstock. I then glued on the head plate veneer, and rough cut the head profile. But before all this I had to plane the fingerboard to the proper width. Two dimensions here are critical: the width at the nut (fret 0) and at the body joint (fret 14). I use fairly common widths of 44 and 55mm respectively. It’s critical to get the neck taper perfect so I do it very slowly and carefully. It also must be symmetrical about the centre line.
Once the fingerboard was the right width I positioned it on the neck and clamped it in place. Then I put the bone nut where it goes, loosely, and finally glued on the head plate veneer. The head plate veneer is a thin walnut piece left over from the back plate.
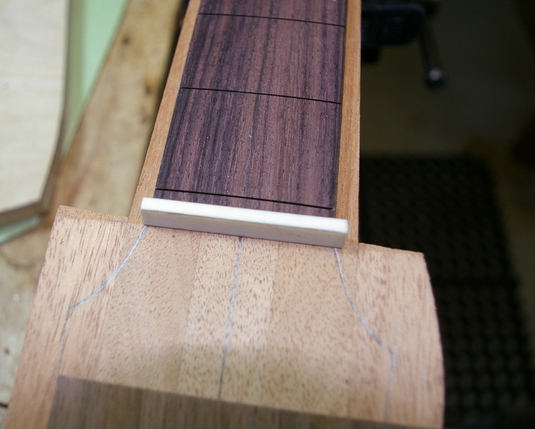
dry fitting the fingerboard, nut and head veneer

head veneer glued and clamped
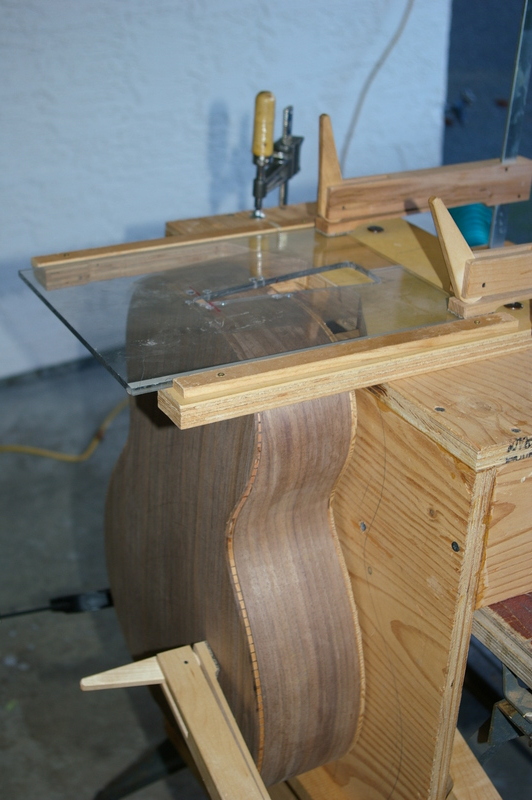
I let the veneer glue set for a while and proceeded to the body. I had previously glued on the back, which is very much the same process as the top, seen on earlier posts. I trimmed off the excess overhanging wood with a hand saw first and then a router. Cutting the binding channels was next. For this I have a jig made up of a laminate trimmer (small router) in a “drill press”. The drill press is one of those things made for a hand drill. I converted/modified it to hold the router. The carrier slides on a vertical pipe. I use a few elastic bands to reduce the weight of the whole moving section, so that it doesn’t rest too heavily on the guitar and make grooves in the top plate. The router has a built in bearing for the width of cut, and has a moveable plate to set the depth. Once set and tested on a scrap piece it’s time to route. I have a “sled” for the body, which is a piece of plywood that holds the body steady and more or less level. This is fed into the router.

binding cutting jig
I cut channels in the back and the top and moved on to the next major routing event – cutting the female neck joint cavity in the body. Out comes the dovetail jig unit, this time with the body template. This is a piece of acrylic with the cavity shape in it. It gets nailed with tiny brads to the body. The holes will not be seen once the neck is installed. This is a very precise procedure. All measurements and angles are checked two or three times. The routing takes only a few seconds however. This time it worked perfectly. The neck fit quite tightly into the cavity. Later it will be final fitted, but for now I’m pleased with the initial cut.

neck cavity template detail
neck cavity router setup

cutting the headstock outline


Thanks for the detailed narrative and great photos! Liam will be interested to see the sequence.